A DIY Venturi Valve For Under $3
Looking for an inexpensive way to aerate the water in your aquarium without adding an air pump? An aquarist need look no further than the Venturi effect.
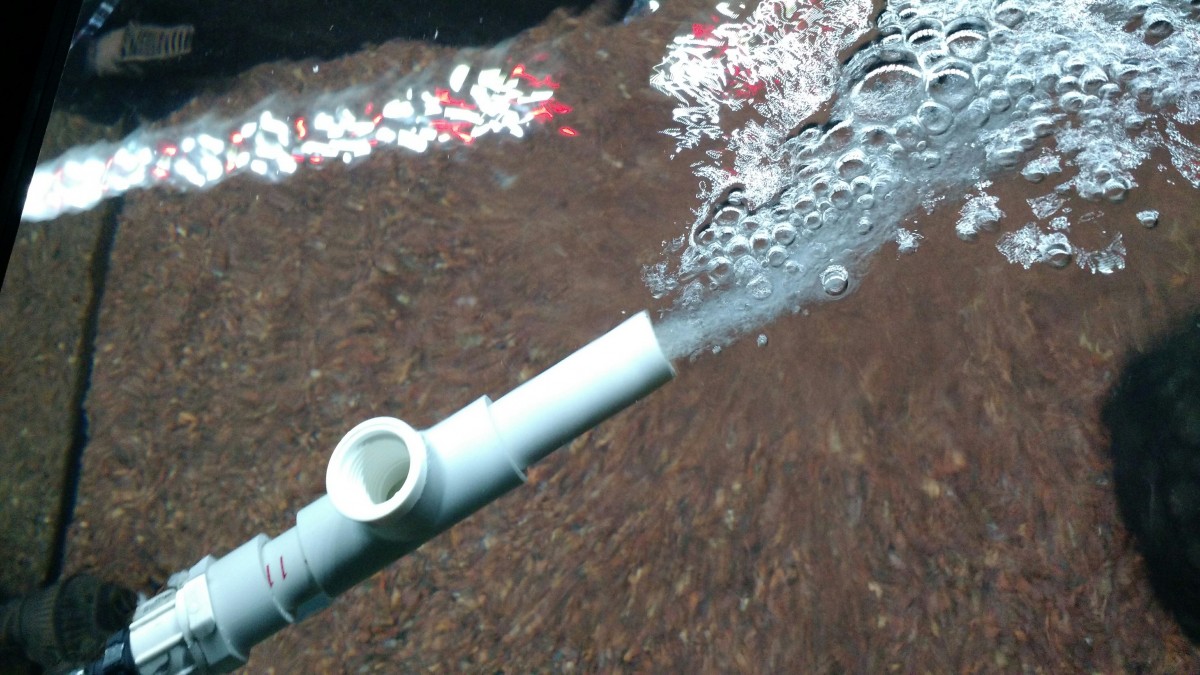
Named after the Italian physicist, Giovanni Battista Venturi (1746 – 1822), the Venturi effect is described as the reduction in fluid pressure that results when a fluid flows through a constricted section (or choke) of a pipe. As the fluid travels through the choke, the velocity of the fluid increases. Any open airway behind the apex or nozzle of the choke will experience a pressure loss, or vacuum.
Ready to build one? Let's go!

For the basic Venturi valve, you will need the following items:
- Watts nylon adapter #PL-217 1/4″ barb x 3/8″ MIP
- 1/2″ SDR-13.5 thinwall PVC pipe
- 1/2″ tee (SxSxFPT)
Determine how you want to deliver tank water to your Venturi valve. In this case, delivery is via 1/2″ vinyl tube from our Eheim canister filter, so we will make the connection with a 1/2″ barbed adapter.

Press the nylon barbed adapter into the tee fitting as far as it will go.

Once the nylon barbed adapter is snug, it should look like this. There is no need to cement it into place, as the interior ridge on the walls of the tee and the snug fit will keep it from shifting around.

From the top, you can see that the apex or or nozzle of the choke extends just beyond the opening in the top side of the tee.

The forward-facing side of the tee with choke in place.

Once in place, connect your thinwall PVC pipe and connector of choice to the back side. You will also need a short section of PVC on the front side (not pictured, but visible in the video). You may opt to cement the thinwall PVC pipe in place, but in most cases, may not be necessary.