Build your own Rack for Multiple Aquariums
As part of my fish room, I needed to build some racks for 20 gallon long aquariums; thanks to RocketEngineer over at Reef Central, I had a base for my own design.
Aquariums
As part of my breeding setup, I chose 20 gallon long tanks for my Apistogramma tanks. Because of the setup in the room, and the lack of foresight of this project happening when I moved in a while back, I needed something that was free-standing and allowed access to the tanks from every side. I chose to go with a rack that would support 4x 20 gallon long aquariums. And I made 2.
The key to glass aquariums is to have even, flat support on all of the edges, usually where the trim is on the tank. With tanks 20 gallons or less, you can get away with support on the long sides and no support on the short sides. This was key in being able to stack tanks vertically.
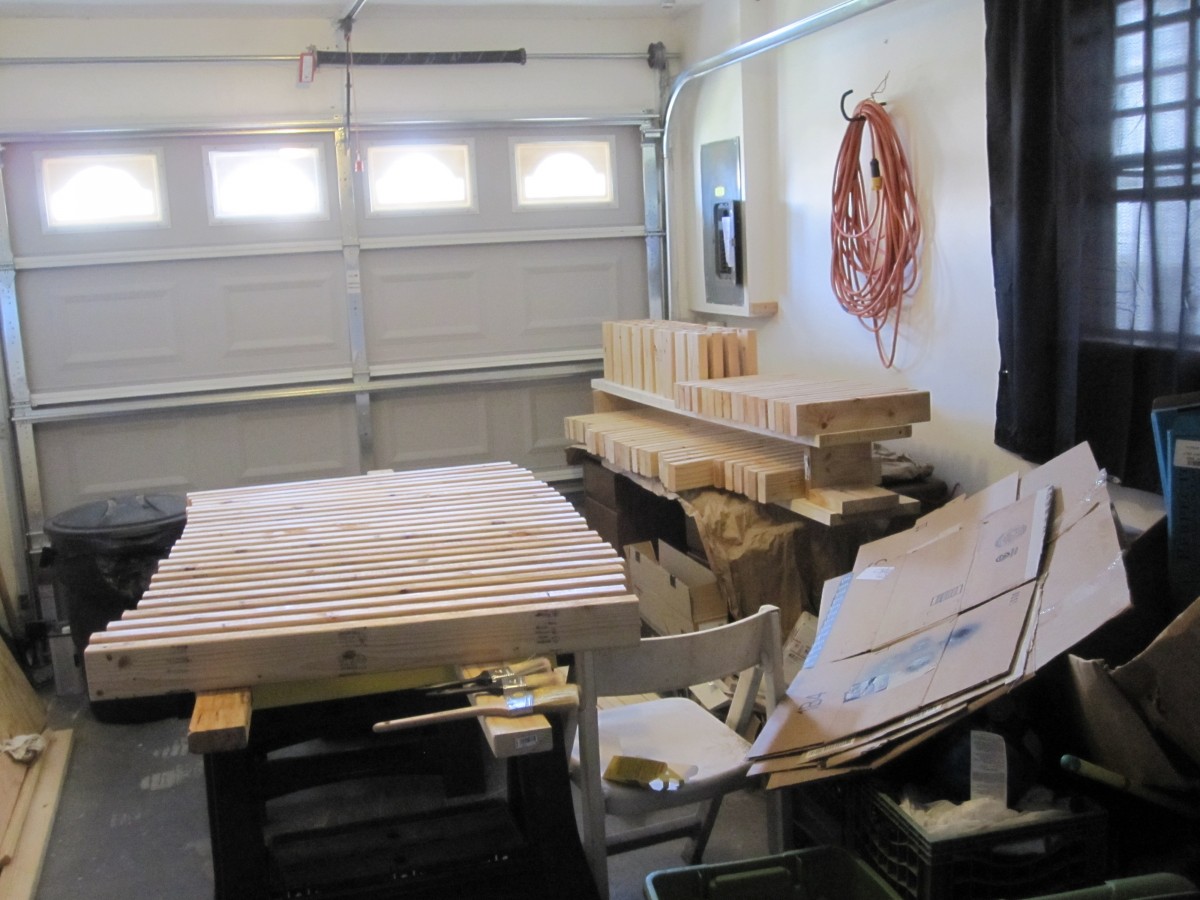
Cuts
I have included the Sketchup plans at the bottom of this page. These plans will work for 4 (or 6) aquariums with the same footprint as a 20 gallon Long aquarium without any additional plywood. These racks were designed for utility, so I did not stain or put faces on it. I did waterproof all of the 2x4s prior to assembly.
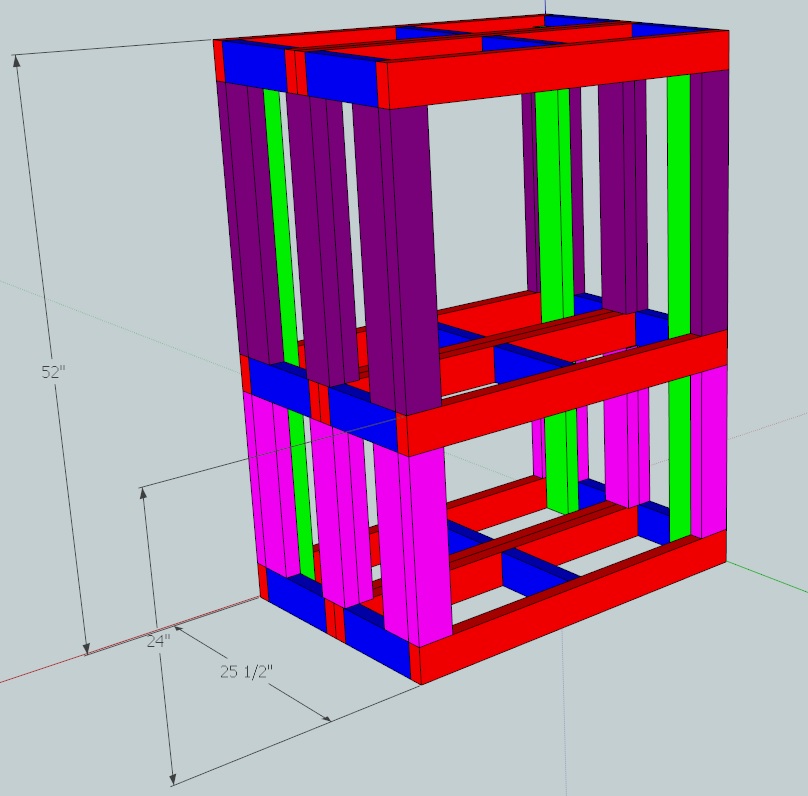
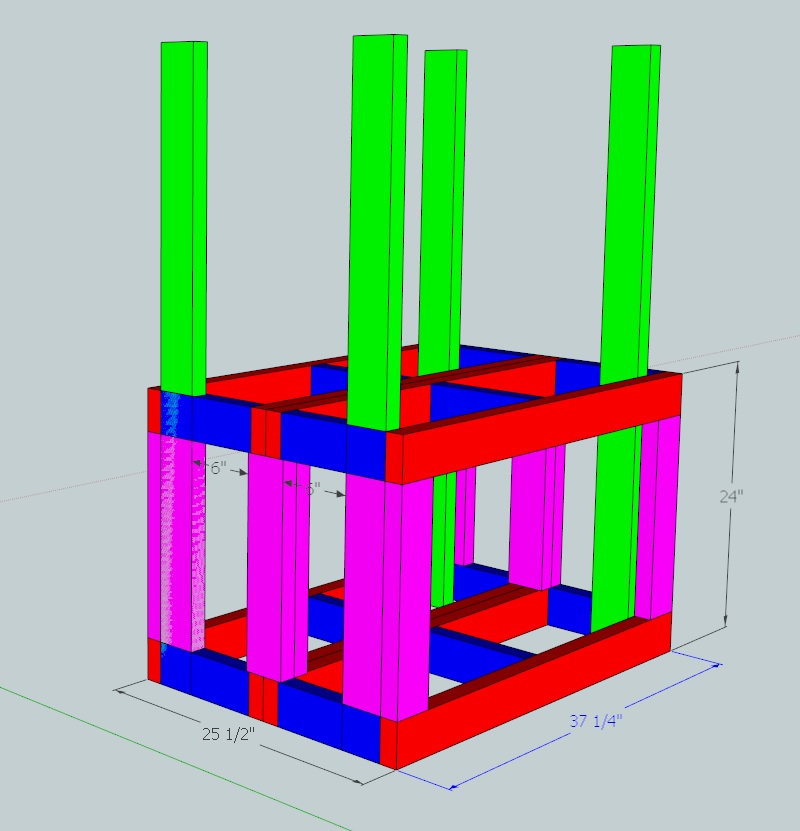
I only used six colors for my stands. The board lengths that I need for this project are:
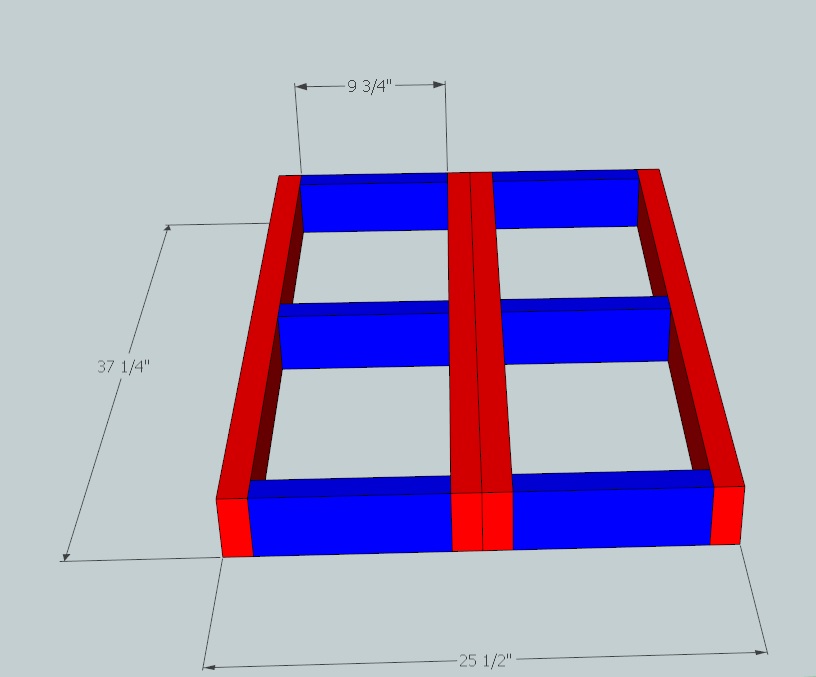
- 12x Red = 37.25″ for direct support of the tank
- 18x Blue = 9.75″ for the ends and cross-braces
- 12x Pink = 17″ to put the bottoms of the tanks on the first level at 24″ to ensure I can still use gravity for water changes
- 12x Purple = 24.5″ which gives a little over a foot clearance above the first level tanks
- 4x Green = 51″ which are the screw strips for the legs and run the entire height of the rack
If you plan on making 2 of these here is the cutlist.
Shelves
I will also need 3″ deck screws and wood glue. The glue is what gives the structure long-term connection, the screws are to hold the wood in place while the glue dries. With this particular stand design, the weight of the tank transfers directly down the supporting legs and onto the base so that there is no sheering tension on any joints. I also pre-drill and counter-sink all of my screw holes.
First, we construct the three boxes which are the top, middle and bottom faces.
Adding the vertical supports
Next, we attach the green screw strips to the bottom base. These strips are used to screw the pink supports into so that you don't need to fuss with pocket holes. These do not need to be glued and can be removed after the structure is complete, but I just leave mine on. These should sit about 1/2″ off of the ground. Once you have these in place, you can put your pink supports on and attach the middle box.

Putting it all together
Now, we can attach the purple legs and final face. I cut out a board to lay on the bottom face for storage. I also mount my power and air to the stand and label my cords per tank. My lighting is hanging from the ceiling for the top level tanks and mounted to the underside of the top frame for my second level tanks.
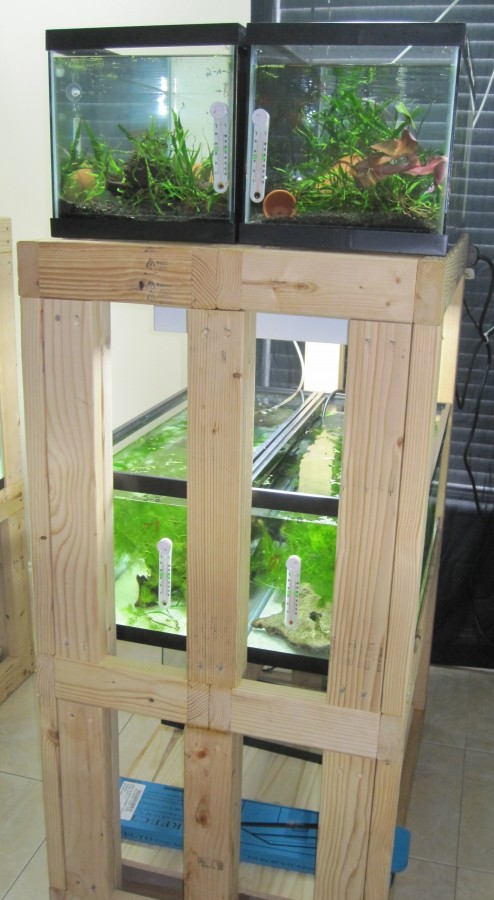
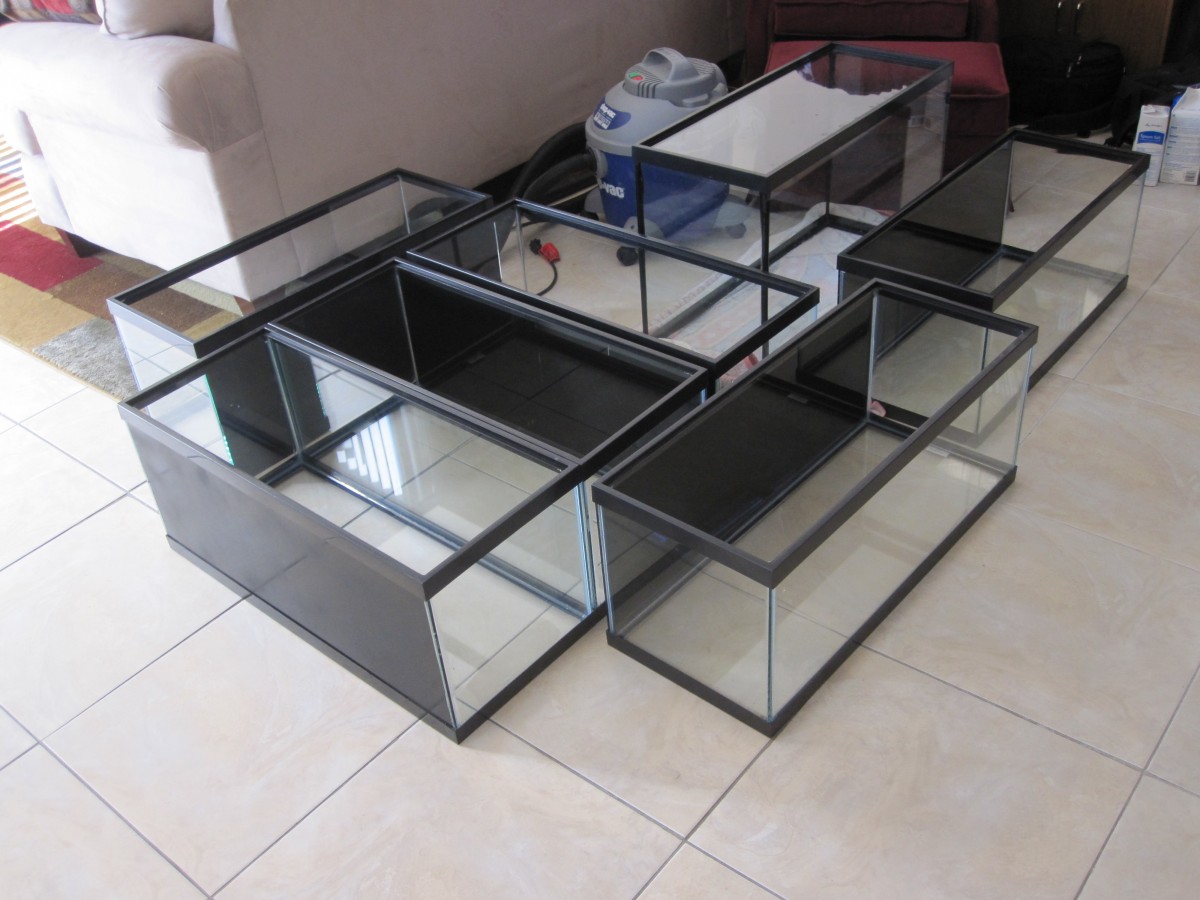
Finished product
Here are my racks in use.
This rack design suits my needs, but it may not suit yours. Obviously, with better planning for a fish room, you can have a more efficient use of space. But, if you are limited like me, you can use these plans and customize them to fit your needs! As promised, here are the Sketchup plans.