What is RO/DI?
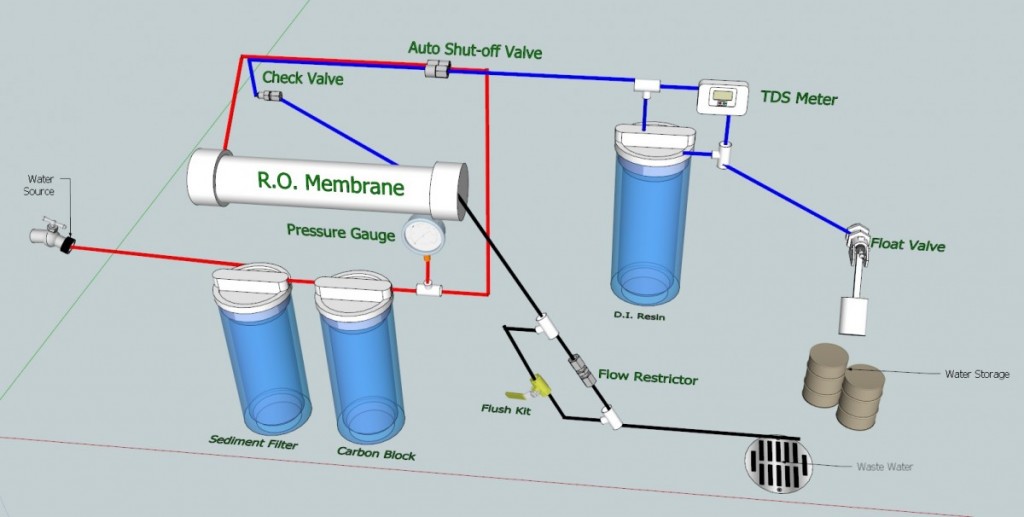
RO/DI stands for Reverse Osmosis and Deionization, usually in respect to a RO/DI water purification system. Essentially, the goal of RO/DI is to produce purified water with minimal total dissolved solids (TDS) present. This is useful in saltwater for mixing water without worrying about any impurities that may throw off the chemical balance. This is also useful for soft water fish, or fish that are naturally from a low conductivity water source. Thirdly, RO water can be used in Walstad low-tech planted tanks.
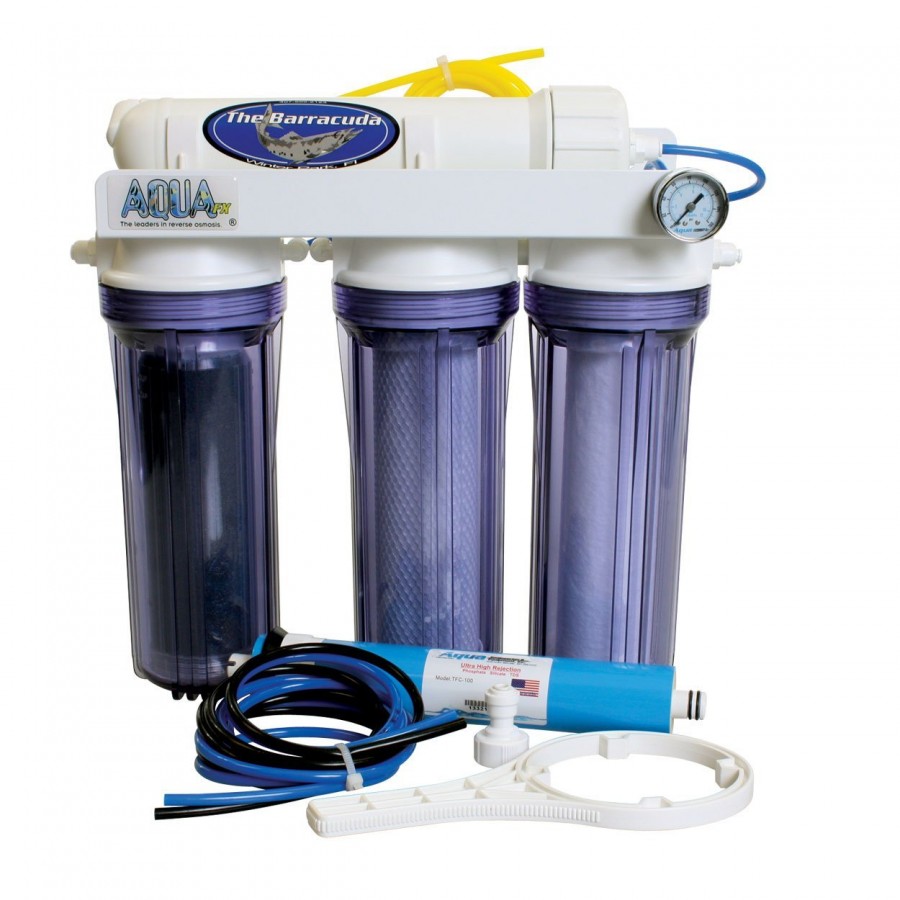
The RO/DI system can be intimidating at first, but once you understand what’s going on inside, the more comfortable you’ll be with it. Your system will most likely have somewhere between 3 (RO only) and 5 (RO/DI) canisters on the unit.
Your first canister will be your sediment filter. The sediment filter traps any particles larger than the size it's graded for. Some are depth-graded, which is to say that they filter throughout the entire wall of the filter, whereas others may only filter at the surface and become clogged by larger particles quickly. The important thing to note is that this filter protects the rest of the canisters from large objects, and becomes clogged the quickest. When it becomes clogged, the flow rate of the water can decrease and the rest of the cartridges will become less efficient.
Next, you’ll have your carbon block. The carbon block works similarly to any other carbon filter you may be familiar with; it removed chlorines and chloramines as well as any organic chemical treatments that may be found in your water source. This filter prepares the water to enter the RO membrane, where the magic happens.
The RO membrane is just that – a membrane that performed reverse osmosis, or pushes water through the membrane in such a way to remove any heavy metals, trace elements and other dissolved solids from the water. This is the heart of the system. The prior canisters are used to extend the life of the membrane, which is the most important tool on the purification system. When water exits the membrane, it exits in two lines – waste water and RO water. The waste water carries all of the impurities out of the system while the RO line transports the purified water to the next stage. When you look at filter efficiency, you’ll notice grades. These refer to the ratio of RO water to waste water. For instance a system that runs 5:1 will utilize 6 gallons of water to produce one gallon of RO water. You’ll want to get the most efficient unit you can afford.
The RO water might now flow into storage or directly into your tank, unless you have a DI stage. The Deionization process is what catches any impurities or dissolved solids that were small enough to make it through the membrane. This is where the water can be reduced down to 0 TDS. The DI stage is not necessary for many aquarists, so if you’re unit doesn’t have one, don’t worry. In fact, some aquarists replace the DI resin in the DI stage with another filter instead of DI resin. It’s really up to what you want out of your system.
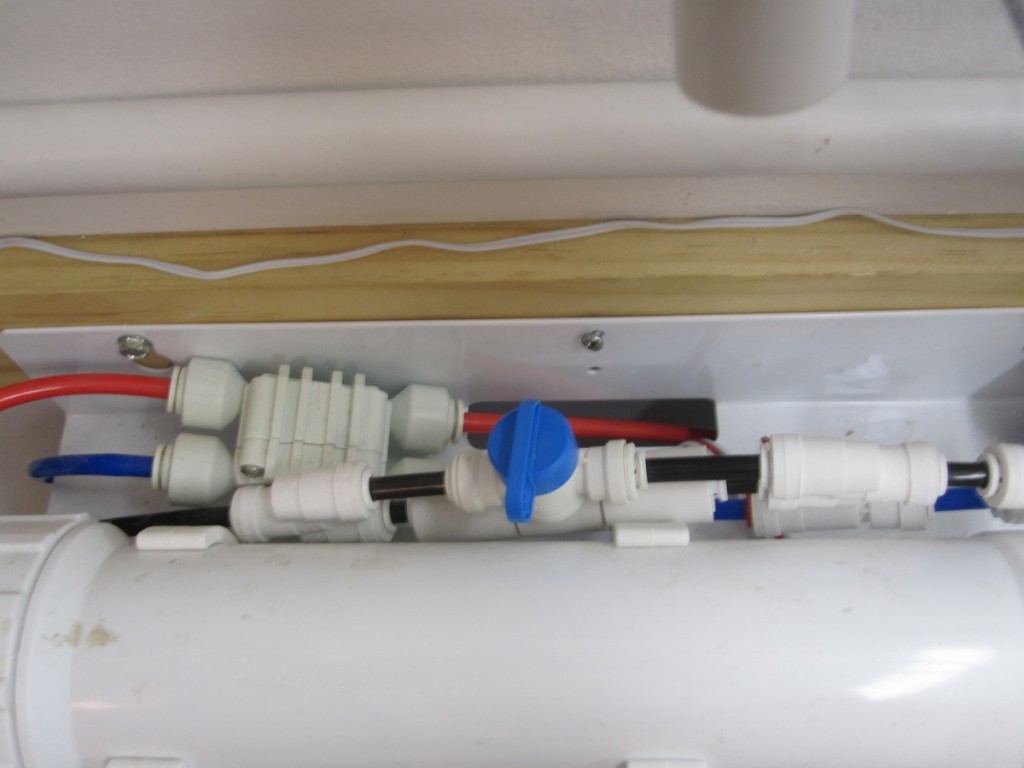
You may be wondering what some of these add-ons or accessories are for the unit you’re looking at. Let’s take a look at the most common items:
Pressure Gauge – this allows you to measure the pressure of the water that is coming out of your water source, or that is going into your membrane. This is important because pressure plays a huge part in the system’s efficiency. If you have insufficient pressure, you may need to get a booster pump.
TDS Meter – this will measure the conductivity (in TDS) coming out of the unit. This can be attached after the RO membrane or after the DI stage. Some will measure both in and out (of the DI stage). This can help you determine when you need to replace your filter media
Flush Kit – the waste water line on the unit has a flow restrictor to keep the pressure up inside the RO membrane. A flush kit bypasses the flow restrictor and lets water rush over the membrane and out through the waste water line, taking with it any particles that come off of the membrane. It’s important to use your flush kit to extend the life of your membrane.
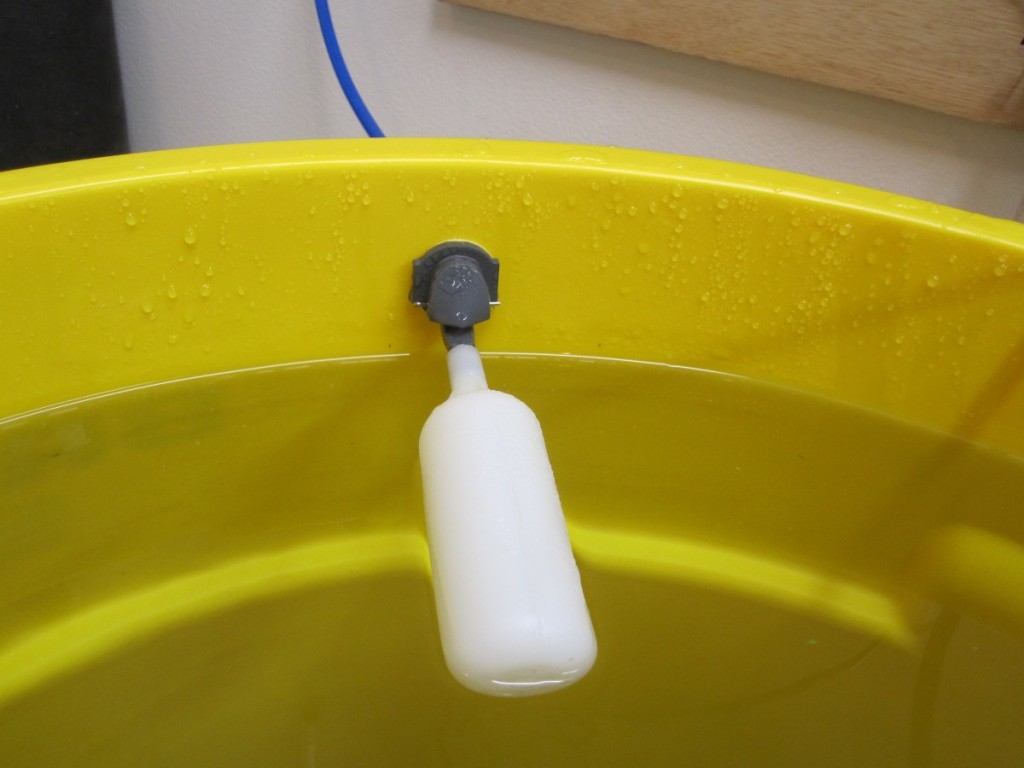
Float Valve – if you want to have your system set up permanently and don’t want to have to remember to turn it off before you fill up your storage container, and subsequently flood your space, you’ll want to get a float valve. This is a valve that is connected to the end of the RO water line and when the storage container is filled, it shuts off the flow of water to the container. Now, the float valve is not designed to absorb all of the pressure behind it, so it goes hand in hand with the auto shut-off valve and the in-line check valve. When the float valve stops the flow of water, the pressure builds up behind it and goes into the auto-shut-off valve. The valve then stops the flow of water into the membrane. In order for this to work properly, there needs to be a check valve that won’t allow the flow of water to reverse.
Something to note is that RO/DI works with cold water, not hot water. We hope this article has been some help to you, either as a beginner or as a refresher!
Need more help determining what kind of RO or RO/DI system you need? Check out locally-owned AquaFX‘s product line on their website, and their many helpful YouTube videos.


